How to Patch a Hole in a Wall: A Step-by-Step Guide for Australian Homes
- Home Maintenance
-
Apr 21
-
4 min read
- Share post
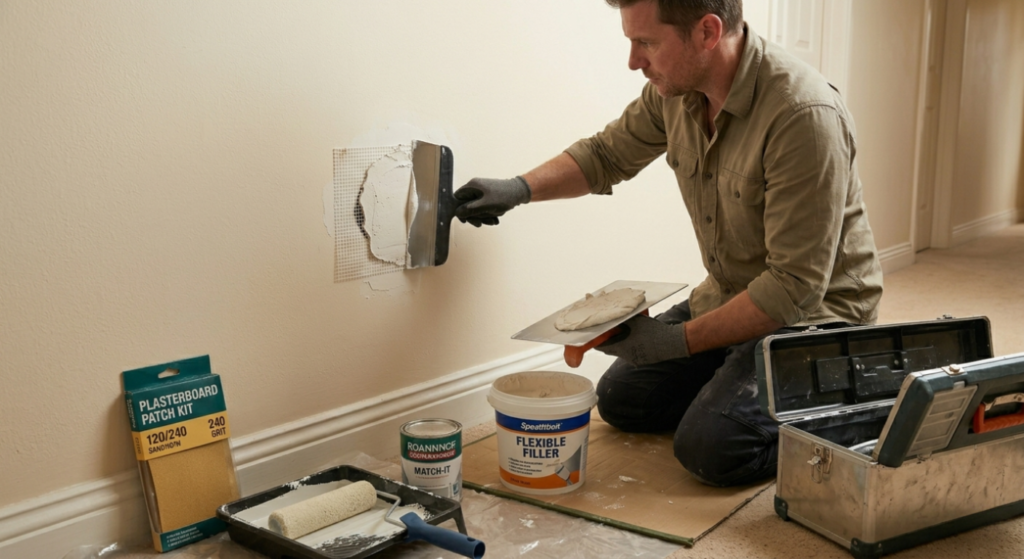
Whether it’s a doorknob that swung too hard, a picture hook that pulled away from the plasterboard, or damage left behind by a previous tenant, holes in walls are one of the most common maintenance issues in Australian homes. The good news is that small to medium holes are straightforward to fix with the right materials and a bit of patience. This guide walks you through exactly how to do it.
What You’ll Need Before you start, pick up the following from Bunnings or your local hardware store:
- Flexible filler or wall putty (for small holes)
- Plasterboard patch kit (for medium to large holes)
- Sandpaper — 120 grit and 240 grit
- Putty knife or filling knife
- Paint to match your wall
- Primer (optional but recommended for a clean finish)
- Damp cloth for cleaning the area
For holes under 10mm, flexible filler alone is usually enough. For larger holes up to around 100mm, a mesh patch kit gives you a solid base to work from.
Step 1: Clean the Area Wipe around the hole with a damp cloth to remove dust, grease and loose debris. If there are any jagged edges of plasterboard sticking out, press them back gently or trim them away with a utility knife. A clean, flat surface gives the filler something solid to bond to and produces a much neater result.
Step 2: Apply the Filler For small holes, load your putty knife with flexible filler and press it firmly into the hole, working it in with a smooth diagonal stroke. Overfill slightly — filler shrinks as it dries, so you want a small mound sitting proud of the wall surface. Wipe away any excess around the edges with a damp cloth before it sets.
For larger holes, apply your mesh patch over the hole first, pressing it flat against the wall. Then apply filler over the top of the mesh in thin layers, feathering the edges outward so the repair blends into the surrounding wall. Let each layer dry fully before applying the next — rushing this step is the most common reason patch jobs look obvious once painted.
Step 3: Sand It Back Once the filler is completely dry — allow at least two to four hours, longer in cold or humid conditions — sand it back with 120 grit sandpaper until it sits flush with the wall. Follow up with 240 grit for a smooth finish. Run your hand over the area to check for any ridges or low spots. If you find any, apply a thin skim of filler, let it dry and sand again.
Step 4: Prime and Paint Apply a coat of primer over the repair before painting, particularly if you’re working on a freshly skimmed area. Primer seals the filler and prevents it from absorbing paint unevenly, which can leave a dull patch even after painting. Once the primer is dry, apply your topcoat. For the best result, feather the paint slightly beyond the repair area so the sheen blends in with the surrounding wall.
Colour matching is the trickiest part of any patch job. If you have leftover paint from when the room was painted, you’re in luck. If not, take a photo of the wall to your local Bunnings paint desk — they can often mix a close match using their colour scanner.
Common Mistakes to Avoid
- Skipping the primer and painting straight over bare filler — this almost always shows
- Applying filler too thick in one coat — thin layers dry better and shrink less
- Sanding before the filler is fully dry — it clogs the sandpaper and tears the repair
- Using the wrong filler — rigid fillers crack over time in areas with movement, so always use a flexible product for plasterboard walls
When to Call a Handyman Instead DIY patching works well for small holes and minor damage. But if you’re dealing with multiple holes, large sections of damaged plasterboard, water-damaged walls, or you simply want a professional finish without the effort, a handyman can handle the whole job cleanly and quickly — often in a single visit. They’ll also have the right tools and touch-up paint techniques to make repairs virtually invisible.
Internal linking opportunity: link “hiring a handyman” to the Questions to Ask a Handyman article and “find a handyman near you” to the directory search page.
Find a Handyman Near You The Australian Handyman Directory lists trusted local handymen across every state. If you’d rather leave the patching to a professional, search by suburb and contact directly — no booking fees, no middlemen.